Building Air Quality Sensor: Luftdaten + Home Assistant
Luftdaten (now Sensor Community) is a global sensor network that measures air quality around the world. Best of all: it's open-source and anyone can build a sensor.
I was very curious to see the air quality in my neighborhood, so I decided to build myself a sensor. And of course, I had to add some Savjee-sauce to it by 3D printing a baseplate for the sensor and microcontroller.
(Disclaimer: this is by no means a complete step-by-step guide)
Hardware
Sensor Community has a good guide on what hardware you need and how you have to configure it. Here are the components I've selected with their price and a link to Amazon:
- Microcontroller (ESP8266): €5,99
- Temperature, humidity and barometer sensor (BME280): €6,49
- Laser Dust Sensor (SDS011): €28,59
- Silicon hose as air inlet (6mm diameter): €6,99
- IP55 case: €1,27
That brings the total cost to €49,33. You could probably get it cheaper by ordering from AliExpress. But this is nonetheless relatively cheap.
A temperature sensor is optional but I figured it would be a nice addition. There's support for different types of sensors (like the DHT22 or SHT31). I picked the BME280 because it measures temperature, humidity, and pressure.
Wiring everything up
Connecting the particulate matter sensor and the temperature sensor to the ESP8266 is relatively straightforward. Again, I followed the official guide:

This is what it looks like in real-life (the temperature sensor is out of view):

3D-printed base
This wouldn't be a Savjee project without some 3D printing. I designed a base plate with standoffs to neatly mount the sensor and microcontroller next to each other (with M3 screws).

The printed version looks like this:

I uploaded the STL and Fusion360 files to Thingiverse, so you can print them as well.
Flashing the microcontroller
Next up: loading the firmware onto the microcontroller. Thankfully, Sensor.Community provides both the firmware and an easy to use flashing tool.
All I had to do was connect the microcontroller to my Mac, download the flashing tool and click a single button. Nice!
(If you're new to programming microcontrollers, you also need to install a driver for the USB-to-serial interface: CP2102)
Linking sensor to SensorCommunity
The last step is to power up the sensor, connect it to your WiFi network, and register it with the community.
Connecting to WiFi was very easy. When it first boots, the microcontroller will create its own network. Connect to that and you'll be greeted by a page where you can configure your WiFi credentials.
During the setup process, you also have to select the sensors you're using. In my case that's the SDS011 and BME280:
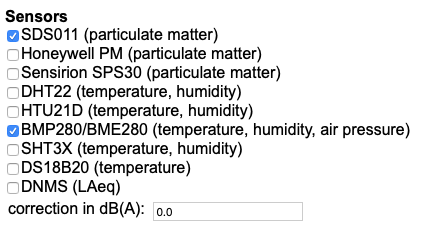
After saving your settings, the microcontroller will connect to your home network. Navigating to its IP address reveals a nice web dashboard where you can change the configuration and monitor the current state:
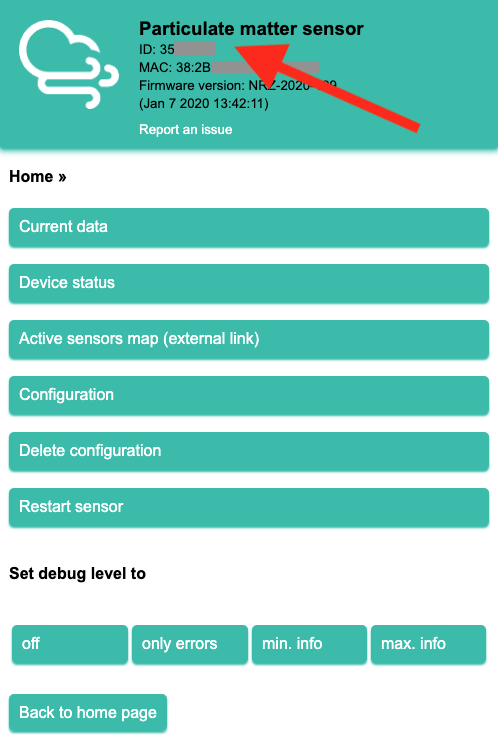
Take note of your device ID. You have to register it here to start contributing to the community.
Home Assistant integration
At this point, my measurements were picked up by the community. However, all my smart devices and sensors are connected to Home Assistant. I don't want to open separate apps for everything, so this air quality sensor could be no exception.
There is a Luftdaten integration available, but I found it very unreliable. It pulls your data from the official API but it would often get stuck for hours on end.
Luckily, the sensors expose their raw data locally as well. Navigate to the IP address of your sensor, followed by /data.json and you'll see all the raw data:
{
  "software_version": "NRZ-2020-129",
  "age": "45",
  "sensordatavalues": [
    {
      "value_type": "SDS_P1",
      "value": "5.10"
    },
    {
      "value_type": "SDS_P2",
      "value": "0.98"
    },
    {
      "value_type": "BME280_temperature",
      "value": "21.31"
    },
    {
      "value_type": "BME280_pressure",
      "value": "101796.47"
    },
    {
      "value_type": "BME280_humidity",
      "value": "51.50"
    },
    {
      "value_type": "samples",
      "value": "4383027"
    },
    {
      "value_type": "min_micro",
      "value": "32"
    },
    {
      "value_type": "max_micro",
      "value": "20038"
    },
    {
      "value_type": "signal",
      "value": "-65"
    }
  ]
}
To import this into Home Assistant, I found a custom integration (local_luftdaten) that fetches this JSON over the local network. No internet required and much more stable!
Configuration is very simple. Add a new sensor, the IP address of your device and the conditions you want to monitor:
sensor:
  - platform: local_luftdaten
    host: 192.168.42.16
    name: Air quality sensor
    monitored_conditions:
      - SDS_P1
      - SDS_P2
      - BME280_temperature
      - BME280_pressure
      - BME280_humidity
      - signal
I opted to monitor air quality (SDS_P1, SDS_P2), temperature, humidity, pressure and the WiFi signal strength.
Restart Home Assistant after installing the integration and changing the config file.
Readings
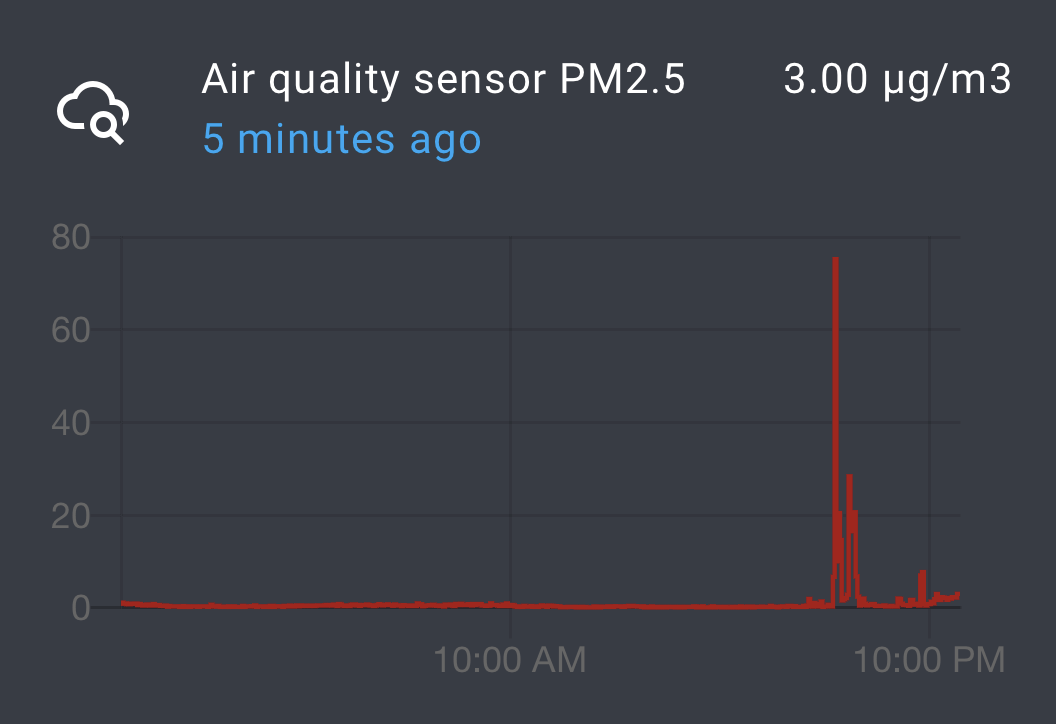
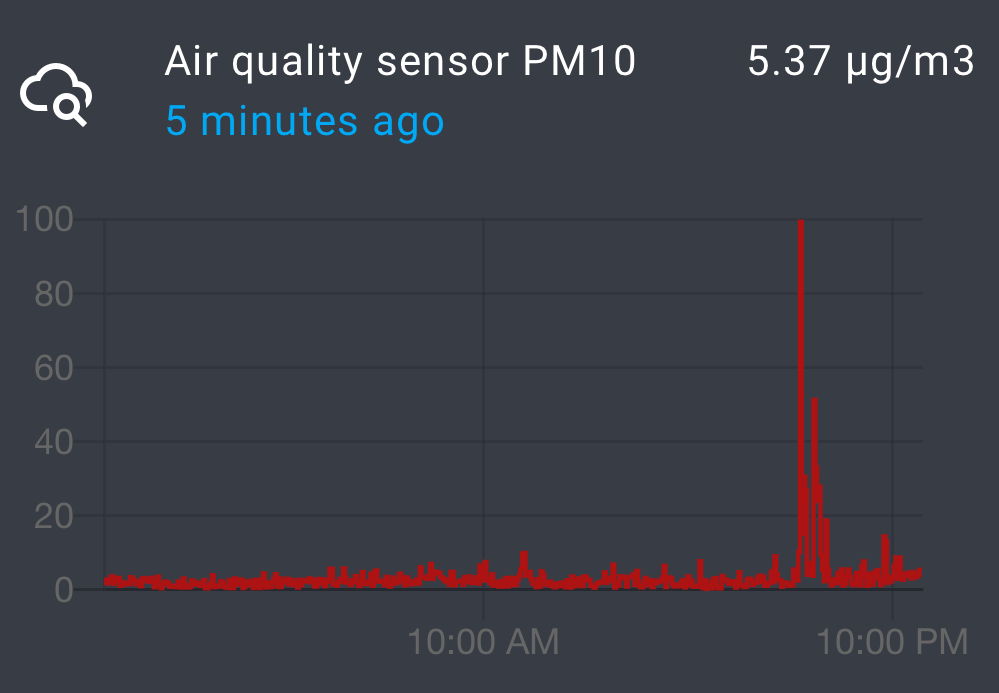
So, how good is the air quality in my neighborhood? Well, not too bad actually!
It's really interesting to see that certain activities like barbecuing causes huge spikes in particulate matter:
Accuracy
After installing the sensor, I wondered how accurate it is. Is this cheap sensor accurate enough so that it can produce useable data for researches?
Well, I found two studies that tested the accuracy of the SDS011:
- By the National Dutch Institute for Public Health and the Environment (NDIPHE): video
- By the Norwegian Institute for Air Research:
- Performance Assessment of a Low-Cost PM2.5 Sensor for a near Four-Month Period in Oslo, Norway
- Read the article here
Both come to similar conclusions:
- The sensor performs quite well when compared to official measurements (although they do need a bit of calibration)
- Humidity over 80% severely impacts the accuracy of the sensors.
- Both confirm that these cheap sensors are accurate enough for wide-scale deployment to get "high-resolution air quality mapping" (while keeping in mind the concerns above)
Future ideas
Right now, my sensor is only reporting its measurements to the community and to Home Assistant. In the future, I might add some automations to it.
In winter periods, air quality usually sees big spikes because of people heating their homes. Could be interesting to send reminders to close the windows at those hours.
Just an idea. I'll wait for the winter to see some actual readings first.
Conclusion
While this isn't a very useful addition to my smart home, it is nice to check up on the air quality from time to time. It's also nice knowing that I'm contributing to a community and that this data might be useful for climate studies and authorities.
Let me know what you thought of this little project (or if you've printed my base cover 😉).

